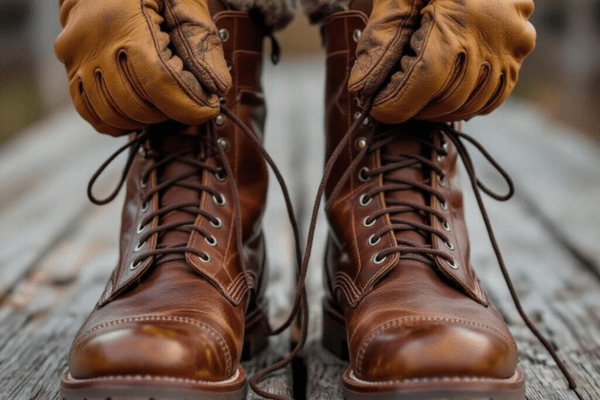
1. Introduction
Boot laces might look minor, but they are essential for providing support, safety, and all-day comfort. Whether you’re wearing work boots, hiking shoes, or everyday leather boots, the laces keep your feet secure. Over time, laces wear out, get dirty, or even break. That’s why it’s important to know how to replace boot laces the right way.
In this guide, you’ll learn step-by-step methods to change your boot laces, tips to choose the right ones, and how to take care of them so they last longer. With proper bootlace care, you can improve both the fit and lifespan of your footwear.
2. How to Replace Boot Laces
Replacing boot laces is a simple task, but doing it the right way keeps your boots comfortable, safe, and long-lasting. Follow these easy steps to learn how to replace boot laces properly.
1. Remove the old laces gently.
Start by untying or cutting the old laces if they are damaged. Pull them out gently from each eyelet.
Pro Tip: Clean the eyelets using a cotton swab or soft brush before adding new laces.
2. Choose the Right Replacement Laces
Make sure the new laces match your boots in length, strength, and style.
- Check eyelet count (more eyelets = longer lace).
- Choose durable material (nylon, paracord, or leather).
- Match color/style with your boots.
3. Thread the New Laces
Start from the bottom eyelets and work your way up using your preferred lacing method:
- Criss-cross for a casual and balanced fit
- Ladder or army lacing for military or work boots
Keep lace ends even as you go.
4. Adjust and Tighten correctly.
Once fully laced, pull both ends evenly. Tighten just enough for support, but not so much that it feels restrictive. This improves comfort and prevents foot pain.
5. Tie a Secure Knot
Use a strong knot like
- Double knot for everyday use
- Surgeon’s knot or heel lock for extra grip during hiking or work
Bonus Tip:
Always carry a spare pair of laces in your bag or car. Knowing how to replace boot laces quickly helps in emergencies or outdoor activities.
3. When Should You Replace Boot Laces?
Boot laces go through a lot of wear and tear. Knowing when to replace boot laces helps you stay comfortable and avoid accidents. Let’s look at the clear signs and timing for replacement.
Signs of Worn-Out Laces
You should replace your boot laces if you notice:
- Fraying or loose threads
- Laces becoming thin or weak
- Broken aglets (the plastic/metal tips)
- Stretched-out shape
- Laces that come undone easily
These indicators show that your laces no longer provide proper hold or support.
Risks of Using Damaged Laces
Using worn-out laces can be risky:
- Tripping hazard if laces snap or untie
- Poor ankle support leading to injuries
- Laces break during activities like hiking, work, or sports.
- Reduced shoe fit, making your boots loose
For your safety and comfort, don’t wait until your laces break completely.
How Often to Check or Replace
Here’s how often to check and replace your boot laces:
- Inspect laces every 1–2 months (especially for work or hiking boots).
- Replace them every 4–6 months if you use your boots daily.
- Replace your laces earlier if they come into contact with water, dirt, or harsh chemicals.
Regular checking is a part of basic boot care. It’s an easy step that helps prevent issues down the road.
Pro Tip: Always keep a spare pair of quality boot laces handy. Learn how to replace boot laces the right way to avoid stress when you’re in a hurry.
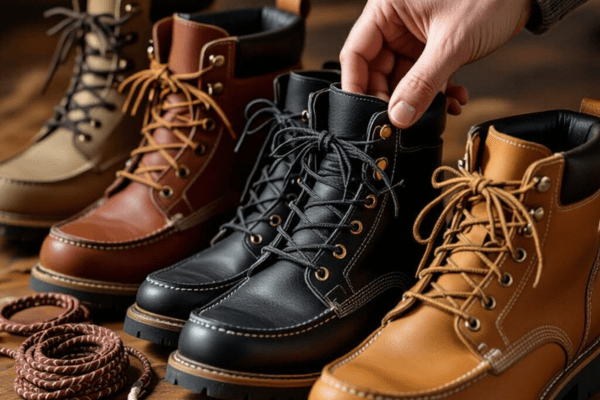
4. Choosing the Right Boot Laces
Choosing the right boot laces is important for comfort, durability, and style. Not all laces work for every boot type. To make the best choice, you need to match the lace to your boot style and understand size factors like length, width, and eyelet count.
Match Laces to Your Boot Type
Different boots need different laces. Here’s a quick guide:
- Hiking Boots: Choose strong, weather-resistant laces. Nylon or paracord laces are best for rough trails.
- Work Boots: Go for thick, durable laces that can handle heavy use and stay tied all day.
- Casual boots go well with lightweight flat or round laces that match your personal style. Cotton or leather laces add style.
- Military Boots: Use tough, long laces that support ladder or army lacing. Choose heat-resistant, black, or tan colors.
Boot Lace Length, Width & Eyelet Guide
Counting the eyelets on your boots is the key to choosing the correct lace length.
| Eyelets (Pair) | Recommended Length |
|---|---|
| 3–4 pairs | 30–45 inches |
| 5–6 pairs | 45–54 inches |
| 7–8 pairs | 54–63 inches |
| 9–10 pairs | 63–72 inches |
- Width:
- Thin laces (2–3mm) are good for casual or fashion boots.
- Thick laces (4–5mm) offer better grip for hiking or work boots.
- Always check your boot’s eyelet size so the lace fits easily.
Extra Tips for the Right Fit
- Always test the lace before final use—try your favorite lace knot techniques to check if they stay tied.
- For bootlace maintenance, wipe your laces clean after long use and replace frayed ones quickly to avoid accidents.
. What Size Laces for Boots?
Knowing the right lace size is important when you’re changing laces in boots. If your boot laces are too short or too long, they can ruin the fit and feel of your boots. Here’s an easy way to find the right lace length for perfect comfort.
How to Measure Correctly
To find the right lace length:
- Count the eyelets—Count the total number of eyelets (holes) on one side of your boot.
- Measure your old lace—If you have the original laces, measure their full length in inches using a ruler or measuring tape.
- Check boot height—taller boots need longer laces. Hiking boots, work boots, and combat boots usually need 45–72 inch laces.
If you’re prepping laces (cutting, sealing aglets) yourself, measure slightly longer and seal the ends with heat or aglet tips.o prevent fraying.
Lace Length Chart by Boot Type or Eyelet Number
| Boot Eyelets (One Side) | Total Eyelets (Both Sides) | Suggested Lace Length |
|---|---|---|
| 3–4 pairs | 6–8 | 36–45 inches |
| 5–6 pairs | 10–12 | 45–54 inches |
| 7–8 pairs | 14–16 | 54–63 inches |
| 9–10 pairs | 18–20 | 63–72 inches |
| 10+ pairs (Tall Boots) | 20+ | 72–84 inches |
Tip: Always size up a little if you like to double knot or use special lacing styles.
Pro Tip: If you’re changing laces in boots for a new style or fit, consider materials like paracord or waxed cotton for better strength and grip.
Leather vs. Nylon Boot Laces
When choosing new boot laces, one common question is, leather vs. nylon boot laces—which is better? Each option comes with its own advantages and disadvantages based on what you’re looking for. Let’s compare them based on durability, appearance, and weather performance.
Pros & Cons of Leather Boot Laces:
Pros:
- Stylish Look: Leather laces give a premium and classic look—perfect for dress boots or work boots.
- Natural Feel: Made from real leather, they’re soft and easy to tie.
- Great for Casual Use: Ideal for light use and fashion boots.
Cons:
- Not Water-Resistant: Leather soaks up water and can get stiff when wet.
- Less Durable for Heavy Use: They may break or stretch with time if used for hiking or outdoor work.
- Needs Care: Requires oiling or conditioning to last longer.
Pros & Cons of Nylon Boot Laces:
Pros:
- High Durability: Strong and long-lasting, even under tough outdoor conditions.
- Weather Resistant: Nylon handles rain, snow, and mud better than leather.
- Good for Hiking & Work Boots: Best choice for heavy-duty or tactical use.
Cons:
- Less Stylish: They don’t offer the same high-end look as leather.
- May Fray Over Time: If not reinforced or waxed, the ends can fray.
Which material is better?
For durability: Nylon boot laces—they are stronger and better for rough use.
For Looks: Leather Boot Laces—Best for a clean, dressy look.
For Weather Resistance: Nylon Boot Laces—Water-resistant and suitable for all weather.
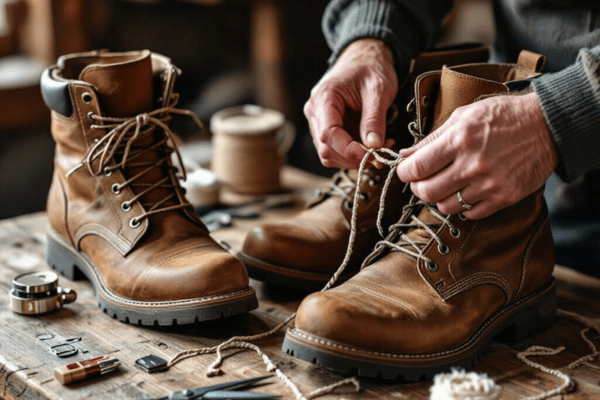
5. How to Prep New Boot Laces
Before you start lacing your boots, it’s important to prepare the new laces properly. A little prep can make your laces last longer and help you lace up more easily.
1. Trim to the Right Length
If your new laces are too long, cut them to the correct size based on your boot’s eyelets. The ideal lace length for most boots usually ranges from 45 to 72 inches. Count your eyelets or measure your old laces to match the length.
2. Seal the Ends After Cutting
Cutting laces can cause fraying. To avoid this, seal the ends immediately. Here’s how:
- For synthetic laces: Use a lighter to gently melt the tip (just a few seconds).
- If you’re using cotton laces, seal the tips by dipping them in fabric glue or a coat of clear nail polish.
This small step prevents the lace ends from unraveling over time.
3. Stiffen the Tips for Easy Lacing
If the lace ends are soft or floppy, they can be hard to thread through the eyelets. You can make them stiffer using
- A drop of glue or wax on the tips
- Clear tape wrapped tightly
Let them dry before use to keep the tips firm.
4. DIY Aglet Tricks (If Ends Are Fraying)
Lost the plastic or metal ends of your laces (called aglets)? Try these DIY aglet hacks:
- Tape Trick: Wrap clear or duct tape tightly around the tip.
- Heat Shrink Tubing: Available at hardware stores—slip on and heat to shrink.
- Glue + Thread: Wrap thread at the end, apply glue, and let it dry hard.
These tricks help extend lace life, especially when you’re learning how to replace boot laces and don’t want to buy new ones immediately.
Final Reminder:
Before you start replacing boot laces, make sure to prepare them properly for best results. Well-prepared laces are easier to use, safer, and look better.
6. How to Put New Laces in Boots
If your old laces are worn out or broken, learning how to replace boot laces the right way can save you time and keep your boots looking fresh. Follow these easy steps to safely put new laces in your boots.
1. Safely Removing Old Laces
Before you can add new laces, you need to remove the old ones carefully:
- Untie the knots without pulling too hard.
- If the lace is stuck or torn, gently cut it with scissors.
- Pull the lace out slowly from each eyelet to avoid damaging the holes or fabric.
Tip: Never yank or twist the laces out too fast—it can damage the eyelets or the boot lining.
2. Cleaning Eyelets Before Re-lacing
Over time, dirt and dust build up in the lace holes (eyelets).
- Gently clean the inside of each eyelet using a cotton swab or a soft-bristled brush.
- A clean eyelet helps the new lace slide in smoothly and prevents friction or tearing.
Clean eyelets make your new laces last longer and look neater.
3. Using a Lace Threader (Optional)
If the lace holes are tight or the lace tip is soft, a lace threader can help:
- Insert the lace into the threader.
- Slide it easily through each eyelet without forcing it.
- This tool works particularly well when dealing with bulky or rounded laces.
You don’t need a threader, but it makes the process faster and safer.
Final Reminder
Knowing how to replace boot laces properly includes not just removing old laces but also preparing your boots for the new ones. Take your time and make sure everything is clean and even for the best fit and look.
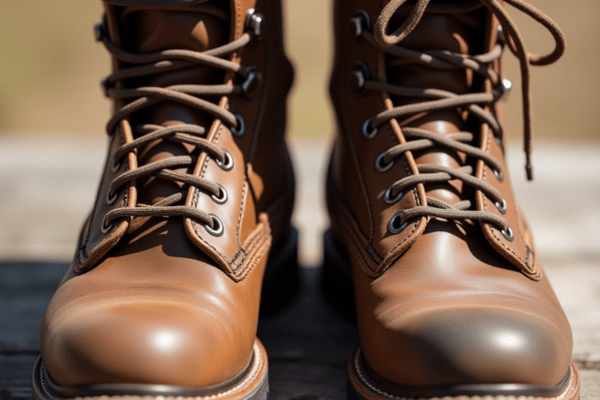
7. How to Lace Boots Properly
Lacing your boots the right way is important for comfort, grip, and foot support. Whether you wear boots for hiking, work, or military use, proper lacing helps avoid pain and improves performance.
Different Lacing Methods
1. Criss-Cross Lacing
- Most common and simple
- Laces cross over each other from one side to the other.
- Best for: everyday wear, hiking, and work boots
- Benefits: balanced pressure, easy to tighten
2. Straight Bar Lacing
- Laces run straight across horizontally.
- Best for: uniform or dress boots
- Benefits: clean look, less pressure on top of foot
- Tip: May feel loose if not pulled tight.
3. Ladder Lacing
- Laces create a ladder-like pattern.
- Best for: military or tactical boots
- Benefits: very secure, strong grip, reduces ankle movement
- Note: Takes more time to lace
Best Lacing Styles for Comfort, Grip, or Military Use
- For comfort: Use criss-cross or window lacing to reduce pressure on sensitive areas.
- For Grip: Try ladder lacing or heel lock lacing for tight support, especially on slopes or during long walks.
- For Military Use: Go with ladder lacing or army-style lacing to avoid loose boots and reduce injury risk.
How to Prevent Lace Bite and Pressure Points
- Don’t over-tighten the middle section of your boots.
- Use gap or window lacing where the boot hurts.
- Choose round or padded laces to reduce pressure.
- Re-lace during the day if feet swell after long hours.
- Make sure eyelets are smooth and not causing friction.
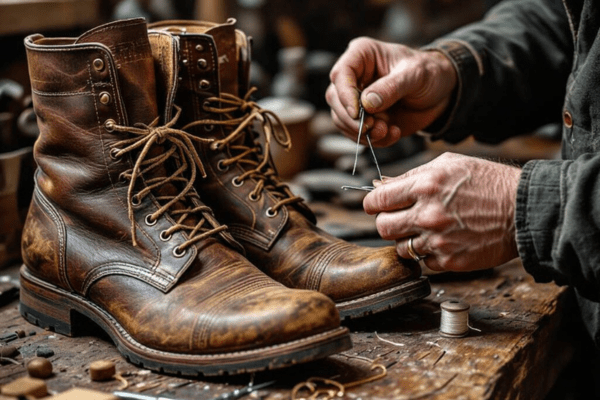
8. Boot Lace Repair Tips
Bootlaces can break at the worst times, but don’t worry—here are some easy and effective bootlace repair tips to help you fix them on the go.
Temporary Fixes for Broken Laces
If your lace snaps while you’re out, try these quick fixes:
- Tie the two broken lace ends together with a firm double knot to hold them securely. It may feel a bit bulky, but it will hold for the day.
- Switch Lacing Style: Skip a few eyelets and relace using a shorter section. It keeps your boot secure until you get a new lace.
- Use a Zip Tie or String: In emergencies, even a strong string or zip tie can temporarily replace your lace.
Keywords: emergency lace fix, quick lace repair, temporary bootlace solution
DIY Aglet Hacks Using Heat Shrink or Straw
When the lace ends (aglets) wear out, threading becomes difficult. Try these easy DIY methods:
- Heat Shrink Tubing:
- Cut a small piece of tubing.
- Slide it over the lace tip.
- Heat it gently with a lighter or hairdryer—it shrinks and seals tightly.
- Straw Method:
- Cut a small straw piece (1 inch).
- Insert the lace tip inside.
- Melt the straw slightly to wrap and seal it.
These hacks extend the life of your laces and make lacing easier.
Keywords: DIY aglet repair, how to fix lace tips, homemade aglet, repair frayed laces
When Repair Is Not Worth It
Sometimes, repairing isn’t enough. Replace your boot laces if:
- They are frayed throughout.
- Multiple knots are needed.
- The lace is too short after repairs.
- They won’t stay tied or keep slipping.
Damaged laces may lead to foot pain or even create safety hazards while walking or working. In such cases, it’s better to get strong, durable replacement boot laces.
9. Strong Boot Laces That Don’t Untie
If your boot laces keep coming undone, it can be annoying—and even dangerous during work, hiking, or heavy activity. In this guide, we’ll share the best strong boot laces that don’t untie, plus smart tips and tools to keep them secure all day.
Double Knot Methods for Extra Hold
One of the easiest ways to stop laces from untying is using the double knot method:
- Tie your regular bow.
- Take the loops and tie another knot using them.
- This adds friction and keeps the knot tight.
For better results, use a surgeon’s knot or Ian’s secure knot—both are stronger than a basic double knot and help laces stay in place longer.
Waxed Laces, Lace Locks & Other Stay-Tied Solutions
Waxed Laces
Wax-coated laces have more grip and don’t slip easily. They’re water-resistant and ideal for work boots, hiking boots, and tactical shoes. Wax adds friction, which keeps the knot tight all day.
Lace Locks (Toggle Locks or Cord Locks)
These are small tools you add to your laces. Simply press and slide to secure your laces—no need to tie them! Great for people on the go or those who want a no-fuss, stay-tied bootlace.
Elastic No-Tie Laces
For a modern twist, no-tie elastic laces stretch and flex with movement. Some come with lock systems for extra security—ideal for everyday boots or casual wear.
Product Suggestions (Affiliate-Friendly Picks)
If you’re doing affiliate marketing, here are some popular, top-rated products you can recommend:
- Rhino Laces—Unbreakable Boot Laces
- Fireproof, cut-resistant, and made for extreme conditions
- Great for military, construction, or outdoor use
- [Add affiliate link]
- IRONLACE Boot Laces
- 100% unbreakable guarantee, made from para-aramid fibers
- Heat-resistant up to 630°F
- [Add affiliate link]
- Lock Laces—No-Tie Shoelace System
- Ideal for work boots and hiking
- Easy to install, adjustable tension
- [Add affiliate link]
- OrthoStep Waxed Boot Laces
- Classic design with wax coating for extra grip
- Perfect for dress boots or formal shoes
- [Add affiliate link]
Final Tip
Always choose durable materials like Kevlar, leather, or waxed cotton if you want strong boot laces that don’t untie. Combine them with secure knots or lace-locking tools for best performance.
10. Bonus Tips for Boot Lace Care
Taking care of your bootlaces is just as important as knowing how to replace bootlaces. Well-maintained laces last longer, look better, and support your boots more effectively. Here are some simple yet effective tips:
How to Wash Boot Laces
Dirty laces can wear out faster and ruin the look of your boots. Here’s how to clean them:
- Remove the laces from your boots.
- Let the laces sit in a bowl of warm water mixed with gentle soap for about 15 to 30 minutes.
- Use a soft brush to scrub away dirt.
- Rinse thoroughly and let them air dry completely.
Pro Tip: Avoid using bleach unless your laces are pure white and made from strong material.
Storing Extra Laces
Always keep a few spare laces for emergencies. Here’s how to store them properly:
- Roll or fold them neatly.
- Store in a small zip-lock bag or drawer.
- Store them in a dry and cool area to protect them from moisture-related damage.
This way, you’re always ready when it’s time to replace boot laces on the go.
Keeping Laces Waterproof & Durable
Want your laces to last longer in rough weather or outdoor conditions?
- Choose wax-coated laces to improve grip and keep moisture out. Spray a fabric protector to shield from moisture and dirt.
- Avoid exposing laces to extreme heat or sunlight for long periods.
Quick Summary:
- Wash your laces regularly for better looks and longer life.
- Store extra laces properly to avoid last-minute issues.
- Use waterproofing methods for durability in all seasons.

11. Conclusion
Taking care of your bootlaces is just as important as knowing how to replace bootlaces. Clean, strong, and properly stored laces not only improve the look of your boots but also ensure comfort and safety. By learning how to clean boot laces, store extras, and keep them waterproof, you extend their life and save money in the long run.
Whether you’re into hiking, work boots, or casual wear—boot lace care helps keep your shoes in top shape. Always check your laces regularly and be ready to replace them when needed.
Discover easy bonus tips to keep your boot laces clean, strong, and long-lasting.
Explore more care guides at bestshoelaces.com
12. FAQs
1. What’s the best way to keep bootlaces from coming undone?
To stop bootlaces from coming loose:Use a double knot or lace lock.Choose waxed laces for better grip.Make sure laces are the right length for your boots.Secure lacing helps avoid the need to constantly fix or replace boot laces.
2. Can I use regular shoelaces in boots?
Regular shoelaces are usually too short and thin for boots. Boot laces are built longer and tougher to withstand rough, everyday use. Using regular laces may lead to breakage, meaning you’ll need to know how to replace boot laces more often.
3. How often should I replace my boot laces?
Check your bootlaces every few months. Replace them if:They look worn or frayedThe tips are damaged.They don’t stay tied.
Taking good care of your laces means you won’t have to replace them as often.
4. What is the strongest material for boot laces?
Top durable materials include
Paracord—flexible and strong
Kevlar—heat-resistant and tough
Leather—stylish and sturdy
Choosing the right material means fewer worries about how to replace boot laces frequently.
5. Are flat or round boot laces better?
Flat laces give a tighter, more secure hold—best for hiking or work boots.
Round laces are easier to tighten—great for casual wear.
Pick the style that matches your boot type and comfort needs. The right laces reduce how often you’ll need to replace boot laces.