1. Introduction
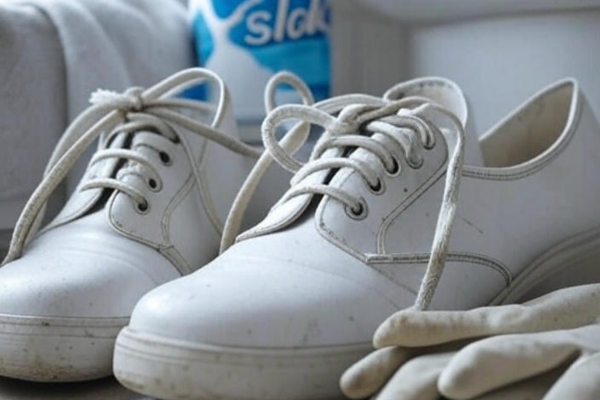
How to Fix a Broken Shoelace Without Replacing can save you time and money when your laces snap unexpectedly. A broken shoelace can be frustrating, especially right before heading out, but the good news is you don’t always need to replace it. With a few simple DIY tricks, you can easily repair a broken shoelace and keep using it for weeks or even months.
Whether your lace snapped in the middle or the plastic tip (aglet) has frayed, there are several quick and affordable ways to repair it. Most of these fixes use everyday household items like tape, thread, glue, or even a straw.
In this guide, you’ll learn practical ways to repair shoelaces at home, quick emergency fixes, and simple tips to make your laces last longer.
1. Fast Fixes for a Broken Shoelace in an Emergency
Sometimes a shoelace breaks when you’re outside or in a hurry. These fast fixes can help you keep your shoes secure until you have time for a proper repair.
Tie the Broken Ends
If the lace snapped in the middle, simply line up both ends and tie a strong knot.
Good knot options include:
- Double knot
- Surgeon’s knot
- Fisherman’s knot
These knots create a secure hold and allow you to continue using the lace temporarily.
Wrap the Ends With Tape
Another quick solution is wrapping the broken section with tape.
Best tape options include:
- Electrical tape
- Duct tape
- Clear adhesive tape
This prevents fraying and helps the lace pass through the shoe eyelets smoothly.
Use a zip tie or safety pin.
For a quick emergency fix, you can also use:
- A small zip tie
- A rubber band
- A safety pin
These items hold the lace together until you can repair it properly at home.
2. Can You Tie a Broken Shoelace?
Yes, tying a broken shoelace is one of the easiest temporary solutions.
However, the type of knot you use matters.
Best Knots for Fixing a Broken Shoelace
Double Knot
Simple, quick, and reliable. It works well for everyday shoes.
Surgeon’s Knot
This knot creates extra friction and prevents the lace from loosening.
Fisherman’s Knot
One of the strongest knots, commonly used for ropes and cords.
Pro Tip
If your shoelaces tend to loosen, try flipping one loop while tying the bow to create a tighter grip. This creates a more secure knot that tightens naturally while walking.
3. DIY Shoelace Repair Methods That Last Longer
If you want a stronger fix that lasts longer, try these simple home repair techniques.
Thread Wrap With Super Glue
This method works great for fixing frayed shoelace tips.
Steps:
- Trim the frayed lace end with scissors.
- Wrap strong thread or dental floss around the tip.
- Add a tiny drop of super glue or clear nail polish to seal the wrap in place.
- Let it dry completely.
The result is a reinforced tip that works like a new aglet.
Tape Reinforcement Method
This is one of the fastest DIY shoelace repairs.
Steps:
- Trim the damaged lace section.
- Wrap tape tightly around the end.
- Press firmly to secure it.
For better durability, add a drop of glue under the tape.
Heat Shrink Tubing
Heat shrink tubing is one of the most durable solutions.
Steps:
- Cut the damaged lace end.
- Place a short section of heat shrink tubing over the end of the shoelace.
- Use a heat source such as a hair dryer, lighter, or heat gun to warm the tubing.
- Let it cool and harden.
This method creates a strong, clean-looking replacement tip similar to the original aglet.
Heat Seal Synthetic Laces
For synthetic shoelaces made of nylon or polyester:
- Trim the frayed end.
- Carefully melt the tip using a lighter.
- Let it cool and shape the end.
This prevents fibers from unraveling and restores the lace tip.
4. Fix Frayed Shoelaces With Household Items
You can repair shoelaces using simple items found at home.
Straw Method
Cut a small piece of plastic straw (about 1–2 cm).
Steps:
- Slide the straw over the frayed lace tip.
- Apply gentle heat.
- The plastic tightens around the lace.
This works like a replacement aglet.
Wax Coating
Another easy method is using wax.
Rub candle wax or beeswax onto the lace tip. This helps:
- Reduce fraying
- Improve durability
- Make laces easier to thread
5. How to Make New Shoelace Tips
If the plastic tips are completely gone, you can create new ones using simple materials.
Popular DIY aglet options include:
- Heat shrink tubing
- Thread and glue
- Strong tape with nail polish coating
Place the material over the end of the lace and fasten it firmly. This helps the lace pass through eyelets easily and prevents further fraying.
6. Tips to Make Your Shoelaces Last Longer
Taking care of your shoelaces can significantly extend their lifespan.
Untie Shoes Before Removing Them
Pulling shoes off without untying puts stress on the laces and weakens the fibers.
Fix Fraying Early
As soon as you notice fraying, seal the tip using:
- Nail polish
- Fabric glue
- Heat sealing
Early repairs prevent bigger damage.
Keep Laces Clean
Dust and debris can slowly damage shoelace fibers, so clean them occasionally using mild soap and water.
Rotate Shoelaces.
If you own multiple pairs of shoes, rotate them to reduce wear on a single set of laces.
7. Emergency Shoelace Repair Kit
Keeping a small repair kit can save you from unexpected shoelace problems.
Helpful items include:
- Small roll of tape
- Zip ties
- Rubber bands
- Needle and thread
- Mini super glue
These simple tools make quick shoelace repairs easy wherever you are.
Conclusion
Knowing how to fix a broken shoelace without replacing it can save both time and money. Simple DIY solutions like tying strong knots, wrapping with tape, using thread and glue, or installing heat shrink tubing can restore your shoelaces quickly.
Taking care of your shoelaces and fixing small issues early can help them last much longer and reduce the need for replacements. Whether you need a quick emergency fix or a longer-lasting repair, these practical methods will keep your shoes secure and ready to wear.
FAQs :
1. What should I do if my shoelace breaks suddenly?
If your shoelace breaks suddenly, stay calm and try a quick emergency shoelace fix like tying a strong knot at the break or wrapping the ends with tape. These simple steps help you keep your shoes secure until you can do a proper repair or replace the laces.
2. Can you tie a broken shoelace to make it usable again?
You can make a broken shoelace work for the moment by tying its ends. By tying the broken ends firmly together, you create a strong hold that works as a quick solution. This method is a common fast solution for broken laces when you don’t have replacement laces handy.
3. How can I fix a broken shoelace at home without replacing it?
You can easily fix laces with household items like super glue, tape, thread, or even a lighter for synthetic laces. Wrapping the broken ends tightly with thread and sealing them with glue or nail polish is a popular way to fix a broken shoelace without replacing it.
4. What are some quick emergency fixes for broken shoelaces?
Quick fixes include tying a knot on the broken part, wrapping tape around frayed ends, using a zip tie or rubber band to hold pieces together, or melting synthetic lace ends slightly with a lighter. These simple hacks provide an effective emergency shoelace fix when you’re in a hurry.
5. How can I extend the lifespan of my shoelaces?
To extend shoelace lifespan, avoid pulling too hard, trim and seal frayed ends early, use aglet protectors, and store your shoes properly. Regular care and small repairs can save you money and reduce the need to replace laces frequently.
6. Are there any DIY remedies to repair torn or frayed shoelaces?
Yes! Common DIY shoelace fix methods include wrapping frayed tips with thread and glue, using tape, heat sealing synthetic ends, and sewing broken parts together. These home remedies are easy, affordable, and effective for keeping your laces in good shape.